Fixing a running or leaking toilet can feel overwhelming, especially if you’re not used to doing repairs at home. However, one of the most common causes is a worn-out toilet flapper. Replacing this small part can stop leaks, save water, and even lower your utility bills. You don’t need to be a plumber or spend a lot of money. With a little guidance, anyone can complete this job in under an hour. This guide will walk you through everything you need to know about toilet flapper replacement, using simple language and clear steps, so you can get your bathroom back in shape without hassle.
What Is A Toilet Flapper?
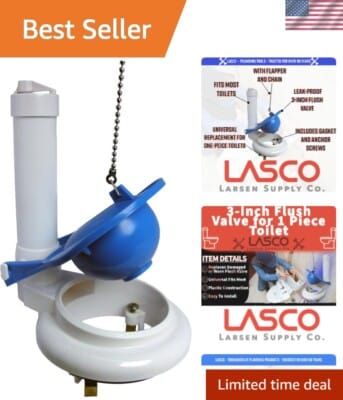
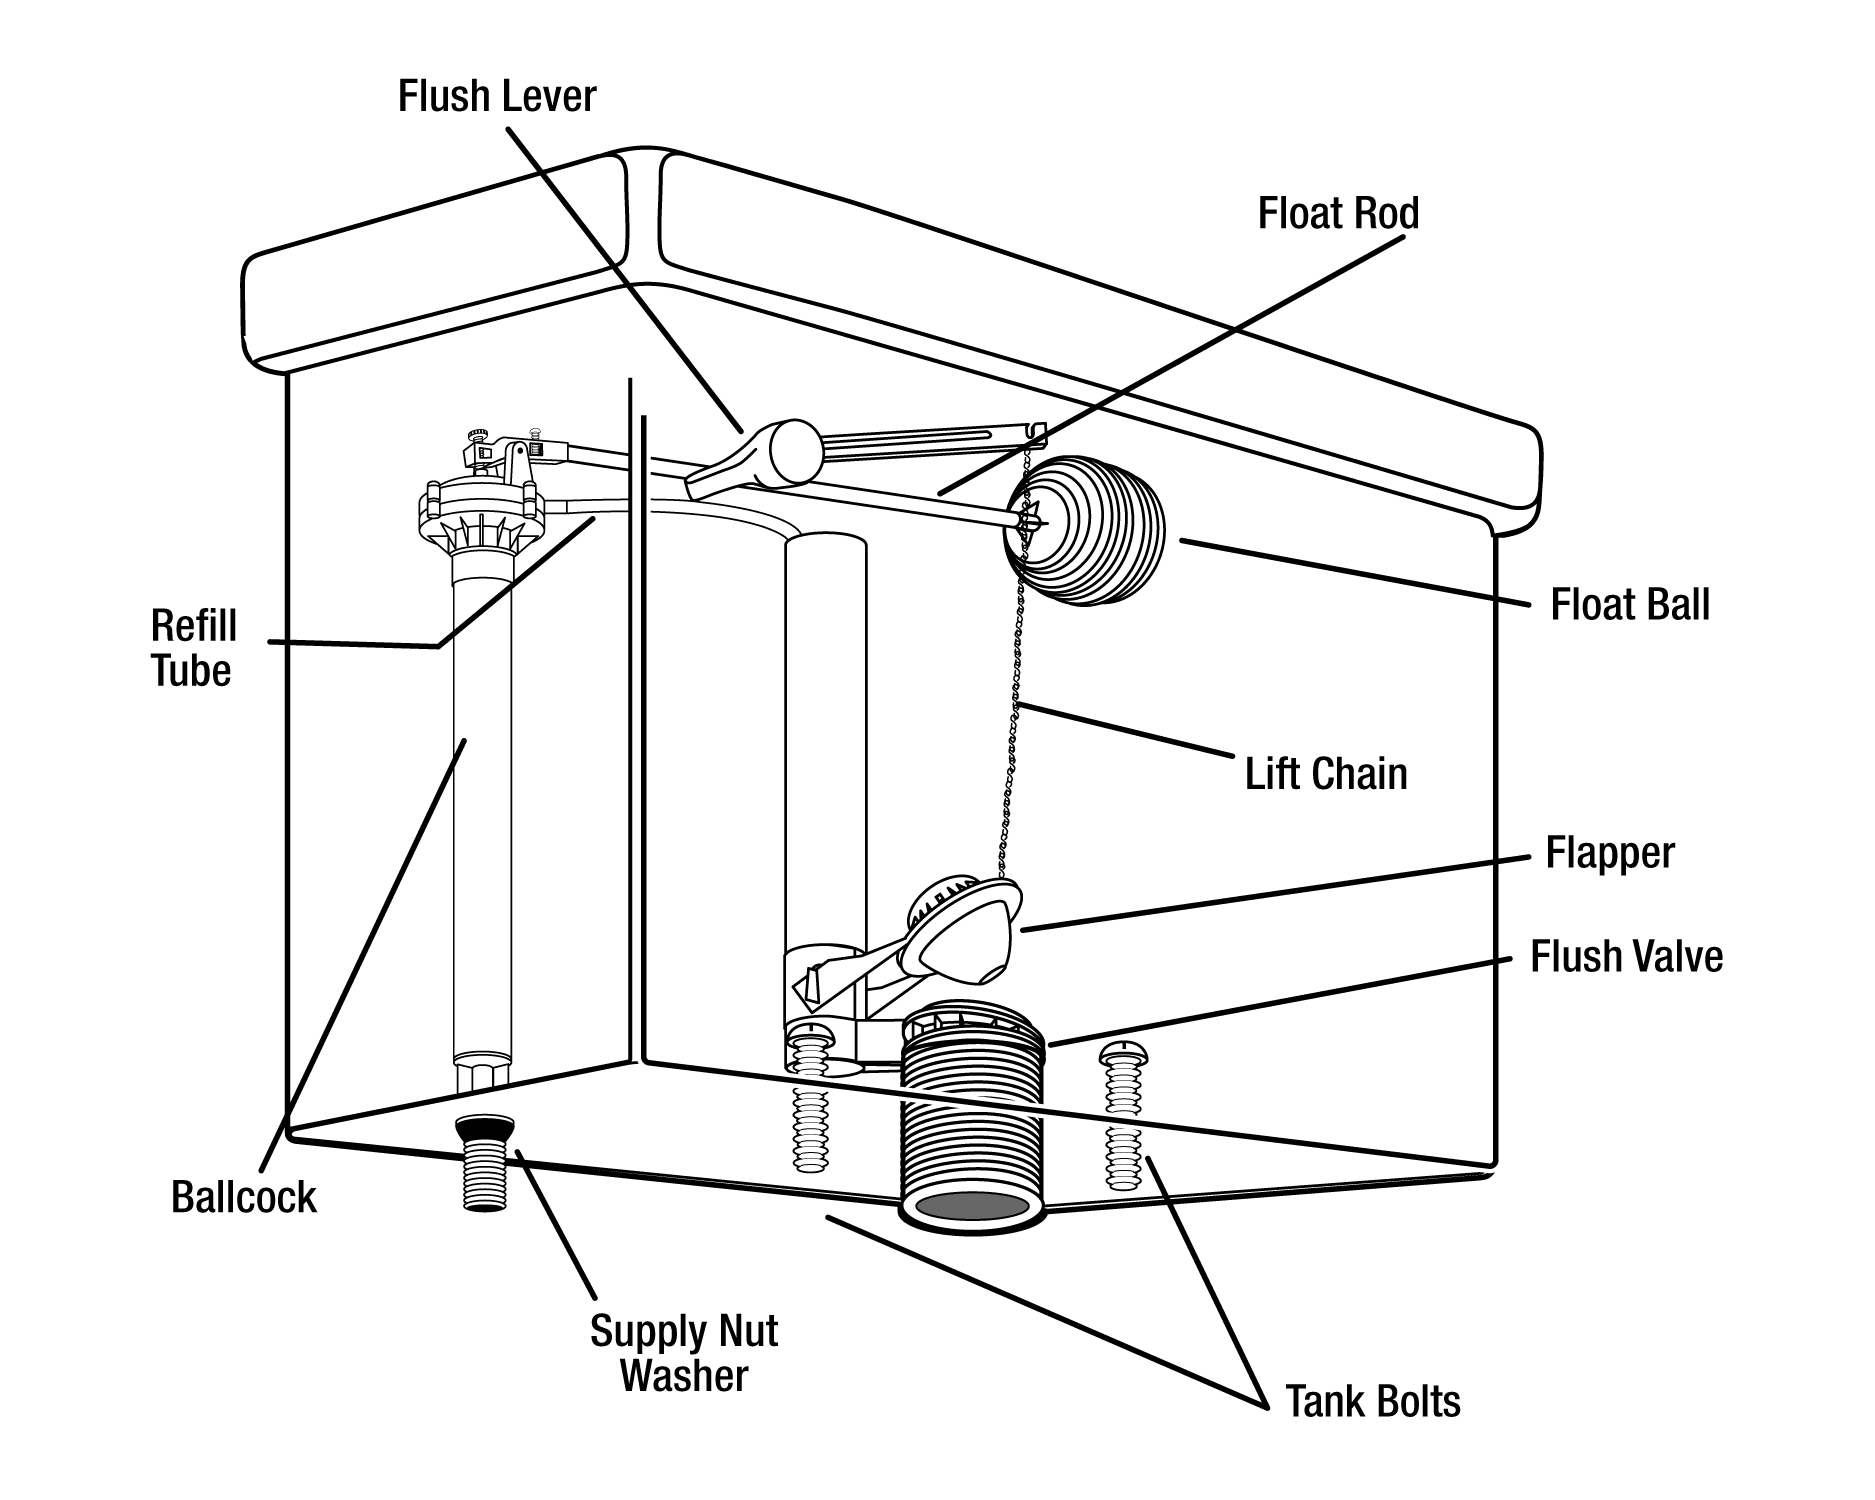
The toilet flapper is a rubber or silicone seal inside your toilet tank. It sits at the bottom of the tank, covering the flush valve opening. When you press the flush handle, the flapper lifts, letting water flow into the bowl. After flushing, the flapper drops back down and seals the valve, allowing the tank to refill.
If the flapper doesn’t seal correctly, water can leak from the tank into the bowl. This causes the toilet to run constantly and wastes a lot of water. According to the Environmental Protection Agency (EPA), a leaky toilet can waste up to 200 gallons of water per day. That’s over 6,000 gallons a month—enough to fill a small swimming pool!
Signs Your Toilet Flapper Needs Replacing
You might not realize your toilet flapper is causing problems until you notice these signs:
- Toilet runs constantly: The water never stops flowing from the tank into the bowl.
- Trickling or hissing noise: You hear water moving even when nobody has used the toilet.
- Phantom flushes: The toilet refills randomly, as if it flushed by itself.
- Visible wear: The flapper looks warped, cracked, or feels sticky to the touch.
- High water bills: A sudden increase often means there’s a leak.
Ignoring these signs can cost you money and waste precious water. Replacing the flapper is a simple and effective solution.
Tools And Materials You’ll Need
Before you start, gather the basic tools and materials:
- New toilet flapper (check size and type)
- Adjustable wrench (optional)
- Sponge or towel (to wipe up water)
- Gloves (if you prefer not to touch the tank directly)
- Bucket (for any extra water)
Most flappers are inexpensive and sold at hardware stores or online. It’s important to choose the correct size and type for your toilet.
How To Choose The Right Toilet Flapper
Toilets use different flapper sizes and materials. Picking the wrong one can cause leaks or flushing issues. Here’s how to make the right choice:
Check Flapper Size
Most toilets use either a 2-inch or 3-inch flapper. The size refers to the diameter of the opening at the bottom of the tank.
| Toilet Type | Flapper Size | Common Brands |
|---|---|---|
| Older Toilets (pre-1994) | 2-inch | American Standard, Kohler |
| Modern Toilets (post-1994) | 3-inch | TOTO, newer Kohler models |
To measure, turn off the water, flush the toilet, and look at the flapper’s diameter or check your toilet manual.
Choose Flapper Material
- Rubber: Most common, fits most toilets, affordable.
- Silicone: More durable, resists hard water and chemicals.
- Chlorine-resistant: Best for toilets in areas with treated water.
Select Flapper Style
- Flexible flappers: Fit many toilets, easier for beginners.
- Solid frame flappers: Offer a tighter seal but may fit fewer models.
Some brands make universal flappers that adjust for different flush volumes. Always match the flapper to your toilet’s brand and model for best results.
Credit: www.dayjologistica.com
Step-by-step Toilet Flapper Replacement
Ready to get your hands wet? Here’s a straightforward method for replacing a toilet flapper.
1. Turn Off The Water Supply
Find the shutoff valve behind your toilet, usually near the floor. Turn it clockwise until it stops. This cuts off water to the tank.
2. Empty The Tank
Flush the toilet to drain most of the water from the tank. Hold down the handle to remove as much as possible. Use a sponge or towel to soak up any water left at the bottom.
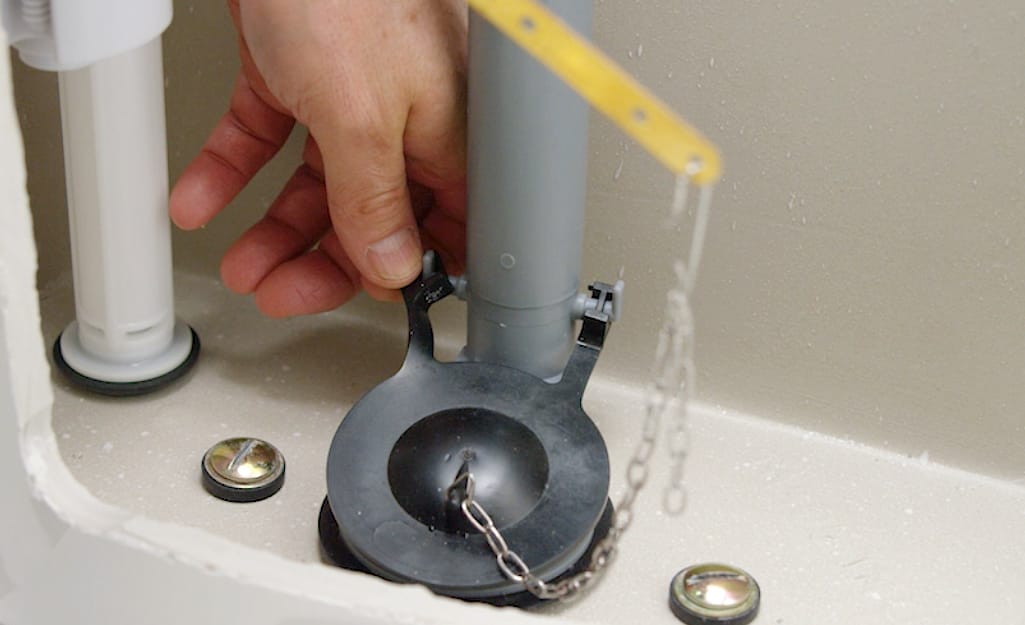
3. Remove The Old Flapper
Gently unhook the flapper’s arms from the side pegs at the base of the overflow tube. If there’s a chain attached to the handle lever, unclip it. The old flapper should lift away easily.
If the flapper is stuck or hard to remove, wiggle it gently or use an adjustable wrench. Be careful not to damage the overflow tube.
4. Clean The Flush Valve Seat
Before installing the new flapper, check the flush valve seat (the ring where the flapper sits). Wipe away any debris, mineral buildup, or slime with a sponge. A clean seat helps the new flapper seal properly.
5. Install The New Flapper
Slide the new flapper’s arms onto the pegs on both sides of the overflow tube. Make sure it sits flat against the flush valve seat. Attach the chain to the handle lever, leaving a small amount of slack. If the chain is too tight or too loose, the flapper won’t seal or lift correctly.
Tip: The chain should have about half an inch of slack. Too much slack means the flapper won’t open fully. Too little slack means the flapper can’t close.
6. Turn On The Water And Test
Turn the shutoff valve counterclockwise to restore water. Let the tank refill, then flush the toilet. Watch the flapper to see if it opens and closes smoothly. Listen for any running water. If the toilet stops running and the flapper seals well, you’ve done the job right.
If you still hear water running, check the chain length or reposition the flapper. Sometimes, a second adjustment is needed for a perfect fit.
Common Problems And Fixes
Even simple jobs can have surprises. Here’s how to handle common issues:
- Water keeps running: Check if the chain is too short or tangled. Adjust as needed.
- Flapper doesn’t seal: Make sure the seat is clean. If the flush valve is cracked, it may need replacement.
- Flapper won’t lift: The chain may be too long or the flapper arms might not be attached securely.
- Tank refills slowly: This is usually a separate issue with the fill valve, not the flapper.
If you replace the flapper and still have problems, the flush valve or fill valve may need repair.
Credit: www.oatey.com
How Toilet Flapper Problems Affect Water Usage
A small leak can add up quickly. Here’s a simple comparison:
| Leak Type | Gallons Wasted per Day | Estimated Cost per Month (USD) |
|---|---|---|
| Slow Leak | 30 | ~$5 |
| Medium Leak | 100 | ~$15 |
| Severe Leak | 200+ | $30 or more |
Fixing a flapper can quickly stop this waste and help protect the environment.
Non-obvious Tips For A Better Flapper Replacement
Many guides stop with the basics, but these extra tips can save time and trouble:
- Check the chain hook position: Some toilet handles have more than one hole for the flapper chain. Try different positions for the smoothest flush.
- Replace the fill valve seal if the toilet still runs after a new flapper. Sometimes, both parts wear out together.
- Use food coloring to test for leaks: Add a few drops to the tank after replacing the flapper. Wait 10 minutes. If color appears in the bowl, there’s still a leak.
- Buy two flappers: If you have more than one similar toilet, replacing both now avoids a second trip later.
- Avoid petroleum jelly on new flappers: It may seem like a good idea for sealing, but it can break down the rubber.
When To Call A Professional
Most flapper replacements are DIY-friendly. But sometimes, the problem is bigger:
- Cracked flush valve seat: Needs special tools or a valve replacement kit.
- Recurring leaks: If you’ve changed the flapper and cleaned the seat but water still leaks, other tank parts may need repair.
- Hard-to-identify models: Some toilets (like dual-flush or specialty brands) use unique parts. Bring the old flapper to the hardware store or consult the manufacturer’s website.
If you’re unsure, a licensed plumber can diagnose and fix the problem quickly.
Cost Of Toilet Flapper Replacement
One reason to do this repair yourself is the low cost. Here’s what you can expect:
| Item | DIY Cost (USD) | Professional Repair (USD) |
|---|---|---|
| Flapper Only | $5–$15 | $60–$120 |
| Flapper + Fill Valve | $20–$35 | $120–$200 |
Most flappers last 3–5 years, so it’s a small investment for peace of mind.
Preventive Maintenance For Your Toilet
To keep your toilet running smoothly:
- Test your flapper for leaks every 6 months using food coloring.
- Clean the inside of your tank once a year to prevent mineral buildup.
- Avoid harsh chemical cleaners, as they damage rubber parts.
- Replace the flapper as soon as you see signs of wear.
These simple steps can prevent leaks and extend the life of your toilet.
Environmental Benefits
Stopping a toilet leak does more than save money. According to the EPA, fixing household leaks can save almost 10,000 gallons of water per year for the average family. That’s enough to supply water to over 10 million homes in the US each year (EPA WaterSense).
Credit: www.homedepot.com
Frequently Asked Questions
How Do I Know Which Toilet Flapper To Buy?
Check your toilet’s brand, model, and the diameter of the flush valve opening. Most toilets use either a 2-inch or 3-inch flapper. If unsure, bring the old flapper to the store or look for a universal replacement.
Can I Replace A Toilet Flapper Without Turning Off The Water?
It’s possible, but not recommended. Turning off the water prevents spills and makes it easier to work inside the tank.
How Long Does A Toilet Flapper Last?
A good-quality flapper lasts about 3–5 years. Hard water, chlorine, or frequent use can reduce its lifespan.
Why Does My Toilet Still Run After Changing The Flapper?
Common reasons include a chain that’s too tight or too loose, debris on the flush valve seat, or a faulty fill valve. Double-check these parts for problems.
Is It Okay To Use Any Flapper, Or Do I Need A Specific Type?
It’s best to match the flapper to your toilet’s make and model. Some universal flappers work for many toilets, but a perfect fit gives the most reliable seal and flush.
Replacing a toilet flapper is a simple job that makes a big impact. With the right tools and a little patience, you can stop leaks, save water, and avoid costly repairs. If you ever feel stuck, don’t hesitate to ask for advice or call a professional. Your wallet—and the planet—will thank you.
