
Welding is more than just joining two pieces of metal. The settings you choose, especially welding voltage, play a huge role in the final quality, strength, and safety of your weld. Many beginners struggle to find the right voltage, leading to weak joints, too much spatter, or even burned-through workpieces. But with the right guidance, you can quickly master voltage selection and get better, more consistent results.
This guide is designed to make welding voltage settings easy to understand—even if English is not your first language. You’ll learn why voltage matters, how to set it for different processes and metals, and how to avoid the most common mistakes. By the end, you’ll have the confidence to adjust your machine correctly for any job.
What Is Welding Voltage?
Welding voltage is the electrical pressure that pushes the welding current through the arc between the electrode and the workpiece. It’s measured in volts (V). In simple terms, voltage controls the length and energy of the welding arc. A higher voltage means a longer, softer arc, while a lower voltage creates a shorter, hotter arc.
Many people confuse voltage with amperage (current). Amperage affects how much metal melts, while voltage shapes how the arc behaves. Both are important, but they do different things.
Why Voltage Settings Matter
Getting the voltage right is one of the most critical parts of welding. Here’s why:
- Arc Stability: Too low voltage makes the arc unstable and hard to control. Too high voltage can make the arc too wide and weak.
- Weld Appearance: Correct voltage gives you a smooth, even bead. Wrong voltage causes defects like undercut, spatter, or excessive penetration.
- Penetration and Fusion: Voltage controls how deep the weld goes into the base metal. Too high or too low can both cause weak welds.
- Spatter Level: Excess voltage often means more spatter, making cleanup harder.
A common beginner mistake is copying someone else’s settings without considering differences in metal thickness, type, or position. Always adjust voltage for your specific job.
Credit: www.arccaptain.com
How Voltage Works In Different Welding Processes
Not all welding processes use voltage in the same way. Let’s look at the most popular ones:
Mig (gmaw)
MIG welding uses a constant voltage power source. You set the voltage on the machine, and the current adjusts automatically depending on wire feed speed. Voltage in MIG welding directly affects bead shape and arc length.
- Short Circuit Transfer: Needs lower voltage (16-20V). Used for thin metals.
- Spray Transfer: Uses higher voltage (22-28V). Good for thick metals and strong welds.
Stick (smaw)
Stick welding uses constant current. You set amperage, and voltage changes as you work. However, some machines let you adjust “arc force” or “dig,” which slightly affects voltage.
- Typical voltage: 20-30V depending on electrode type and diameter.
Tig (gtaw)
TIG welding also uses constant current. The voltage depends on arc length, but you can adjust settings for arc start or special modes.
- Typical voltage: 10-25V, but you rarely set voltage directly.
Flux-cored Arc Welding (fcaw)
Similar to MIG, but usually needs a bit more voltage for the same wire diameter.
- Voltage range: 17-30V depending on the wire and position.
Choosing The Right Voltage For Different Metals
Every metal needs a different voltage. Setting it wrong can ruin your work or even damage your machine. Here’s a guide for the most common metals:
| Metal | Typical Voltage Range (MIG) | Notes |
|---|---|---|
| Steel (mild) | 16-26V | Start low for thin, raise for thick |
| Stainless Steel | 17-27V | Needs stable arc, avoid overheating |
| Aluminum | 18-28V | Requires higher voltage and fast travel |
| Cast Iron | 18-24V | Preheat often needed |
Always check the wire or electrode manufacturer’s chart for recommended settings. These give a safe starting point.
Matching Voltage To Material Thickness
Not sure how voltage and material thickness relate? Here’s a helpful comparison:
| Material Thickness | Voltage Setting (MIG) | Example Use |
|---|---|---|
| 1/16″ (1.6mm) | 16-17V | Sheet metal, auto panels |
| 1/8″ (3.2mm) | 18-20V | Light frames, brackets |
| 1/4″ (6mm) | 22-24V | Heavy frames, machinery |
| 3/8″ (10mm)+ | 25-28V | Structural steel, thick plate |
If you use too little voltage on thick metal, your weld won’t penetrate. Too much on thin metal will burn holes.
Step-by-step: How To Set Welding Voltage
Setting the right voltage is not just about turning a dial. Here’s a practical method:
- Identify Your Process: MIG, TIG, Stick, or Flux-cored? Each has different voltage needs.
- Check the Chart: Most machines or wires come with a recommended voltage chart. Start here.
- Set Wire Feed Speed (for MIG): Adjust this first, as it affects the current.
- Set Voltage: Turn the dial to the recommended starting point.
- Test on Scrap: Weld a short bead on a piece of similar scrap metal.
- Inspect the Weld:
- Too Flat/Wide: Voltage likely too high. Lower a bit.
- Too Narrow/Ropey: Voltage likely too low. Raise a bit.
- Lots of Spatter: Often caused by voltage being too high or too low—adjust and retest.
- Fine-Tune: Adjust in small steps (0.5V at a time). Repeat until the bead looks and sounds right.
Visual Signs Of Correct And Incorrect Voltage
Weld appearance tells you a lot. Here are some things to look for:
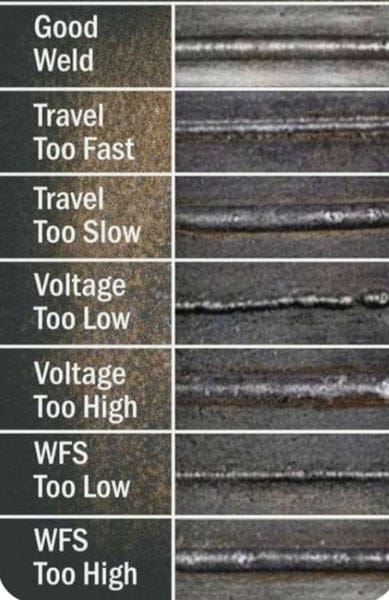
- Correct voltage: Bead is smooth, slightly convex, with little spatter. Edges fuse cleanly.
- Voltage too low: Bead is tall, narrow, and sometimes with undercut. Arc is short and harsh.
- Voltage too high: Bead is wide, flat, often with excessive spatter. Arc is too long and hard to control.
Many beginners don’t realize that sound is also a clue. A steady “hiss” or soft “crackle” means you’re close. Loud popping or irregular noise means you need to adjust.
Special Cases: Overhead, Vertical, And Out-of-position Welding
Welding in different positions changes how you set voltage:
- Overhead or Vertical: Lower the voltage slightly compared to flat welding. This helps keep the puddle from falling.
- Flat/Horizontal: Use the full recommended voltage for your thickness.
For example, if you use 20V for flat welding on 1/8″ steel, drop to 18. 5-19V for vertical or overhead positions.
Common Mistakes And How To Avoid Them
- Ignoring Manufacturer’s Settings: Every machine and wire is a bit different. Always check the recommended chart.
- Not Testing on Scrap: Skipping this step leads to poor results and wasted time.
- Adjusting Too Much at Once: Change voltage in small steps. Big jumps make it hard to find the sweet spot.
- Confusing Amperage and Voltage: Remember, voltage shapes the arc, amperage melts the metal.
- Not Considering Other Settings: Wire speed, travel speed, and gas flow also matter. Don’t focus only on voltage.
A non-obvious tip: Even the extension cord you use can affect voltage at the machine. Long or thin cords can drop voltage, leading to weaker welds. Use thick, short cords when possible.
How Modern Welders Help With Voltage Settings
Many new welding machines have features to make voltage setting easier:
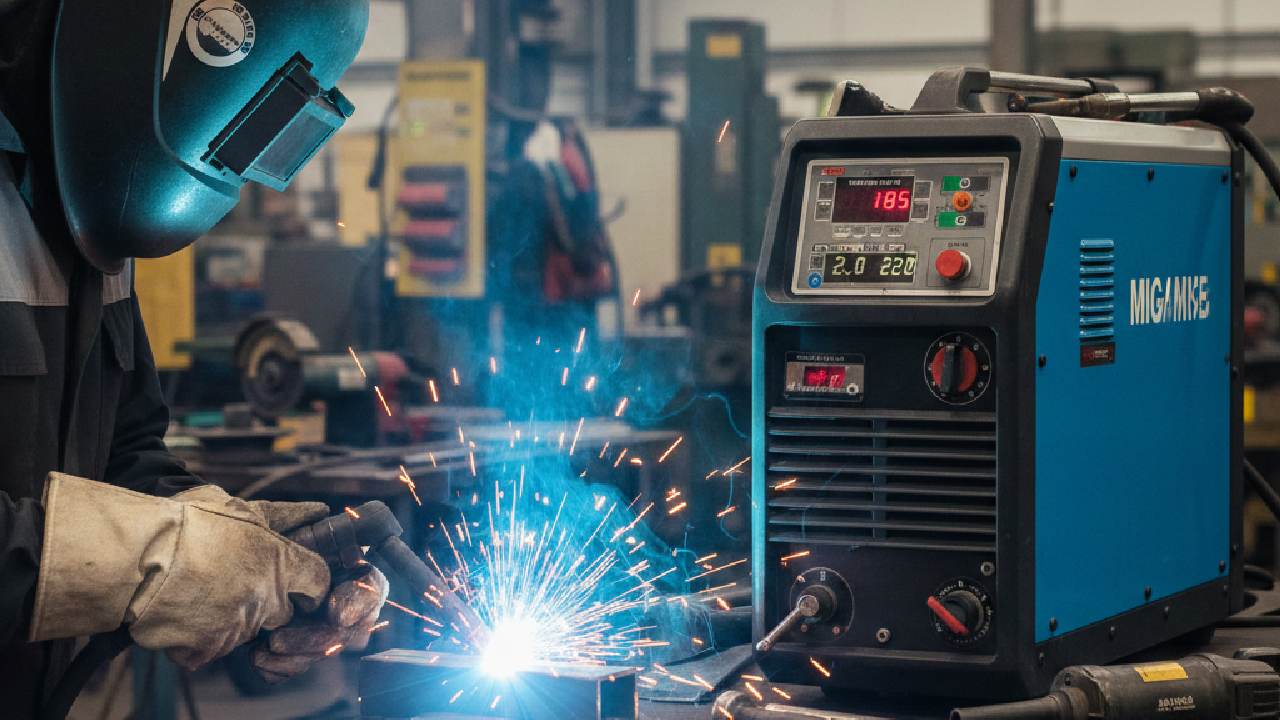
- Digital Displays: Show exact voltage for repeatable settings.
- Synergic Controls: You set wire speed, and the machine sets voltage automatically. Good for beginners.
- Memory Presets: Save your favorite settings for different jobs.
But even with smart machines, you still need to check and fine-tune based on your material and position.
Credit: wholesale.yeswelder.com
Adjusting Voltage For Welding Wires And Electrodes
Different wires and electrodes need different voltages. For example:
- .030″ MIG wire: Good with 16-20V on thin steel.
- .045″ flux-cored wire: Needs 22-28V on thicker steel.
Always read the packaging or data sheet. Some wires, especially specialty types, have narrow “sweet spots” for voltage.
Safety Note: High Voltage Risks
Welding machines can deliver dangerous voltages. Always:
- Wear dry gloves.
- Stand on a dry surface.
- Don’t adjust settings with wet hands.
This is especially important when welding outdoors or in damp conditions. Safety first.
Advanced Tip: Adjusting For Joint Type
The type of weld joint matters:
- Butt joints: Use standard voltage for the metal thickness.
- Lap or T joints: Sometimes need slightly more voltage for full fusion.
If you see lack of fusion at the joint edges, try raising voltage by 0. 5-1V.
Practical Examples
Let’s look at some real-life scenarios:
- Auto body repair (thin steel, 1/16”): Use 16.5-17V, .023” wire, short circuit transfer.
- Structural steel (1/4”): Use 22-24V, .035” or .045” wire, spray transfer if possible.
- Aluminum boat repair (3mm): Start at 20-22V, adjust for clean, fast welds.
Each job is unique, but these examples give you a strong starting point.
Data: Typical Voltage Ranges By Process
For a quick comparison, here’s a table of standard voltage ranges:
| Welding Process | Voltage Range | Notes |
|---|---|---|
| MIG (Short Circuit) | 16-20V | Thin steel, low spatter |
| MIG (Spray Transfer) | 22-28V | Thicker metals, high speed |
| Flux-Cored (Gas-shielded) | 18-30V | Versatile, out-of-position |
| Stick | 20-30V | Electrode type matters |
| TIG | 10-25V | Not directly set |
Where To Find More Detailed Settings
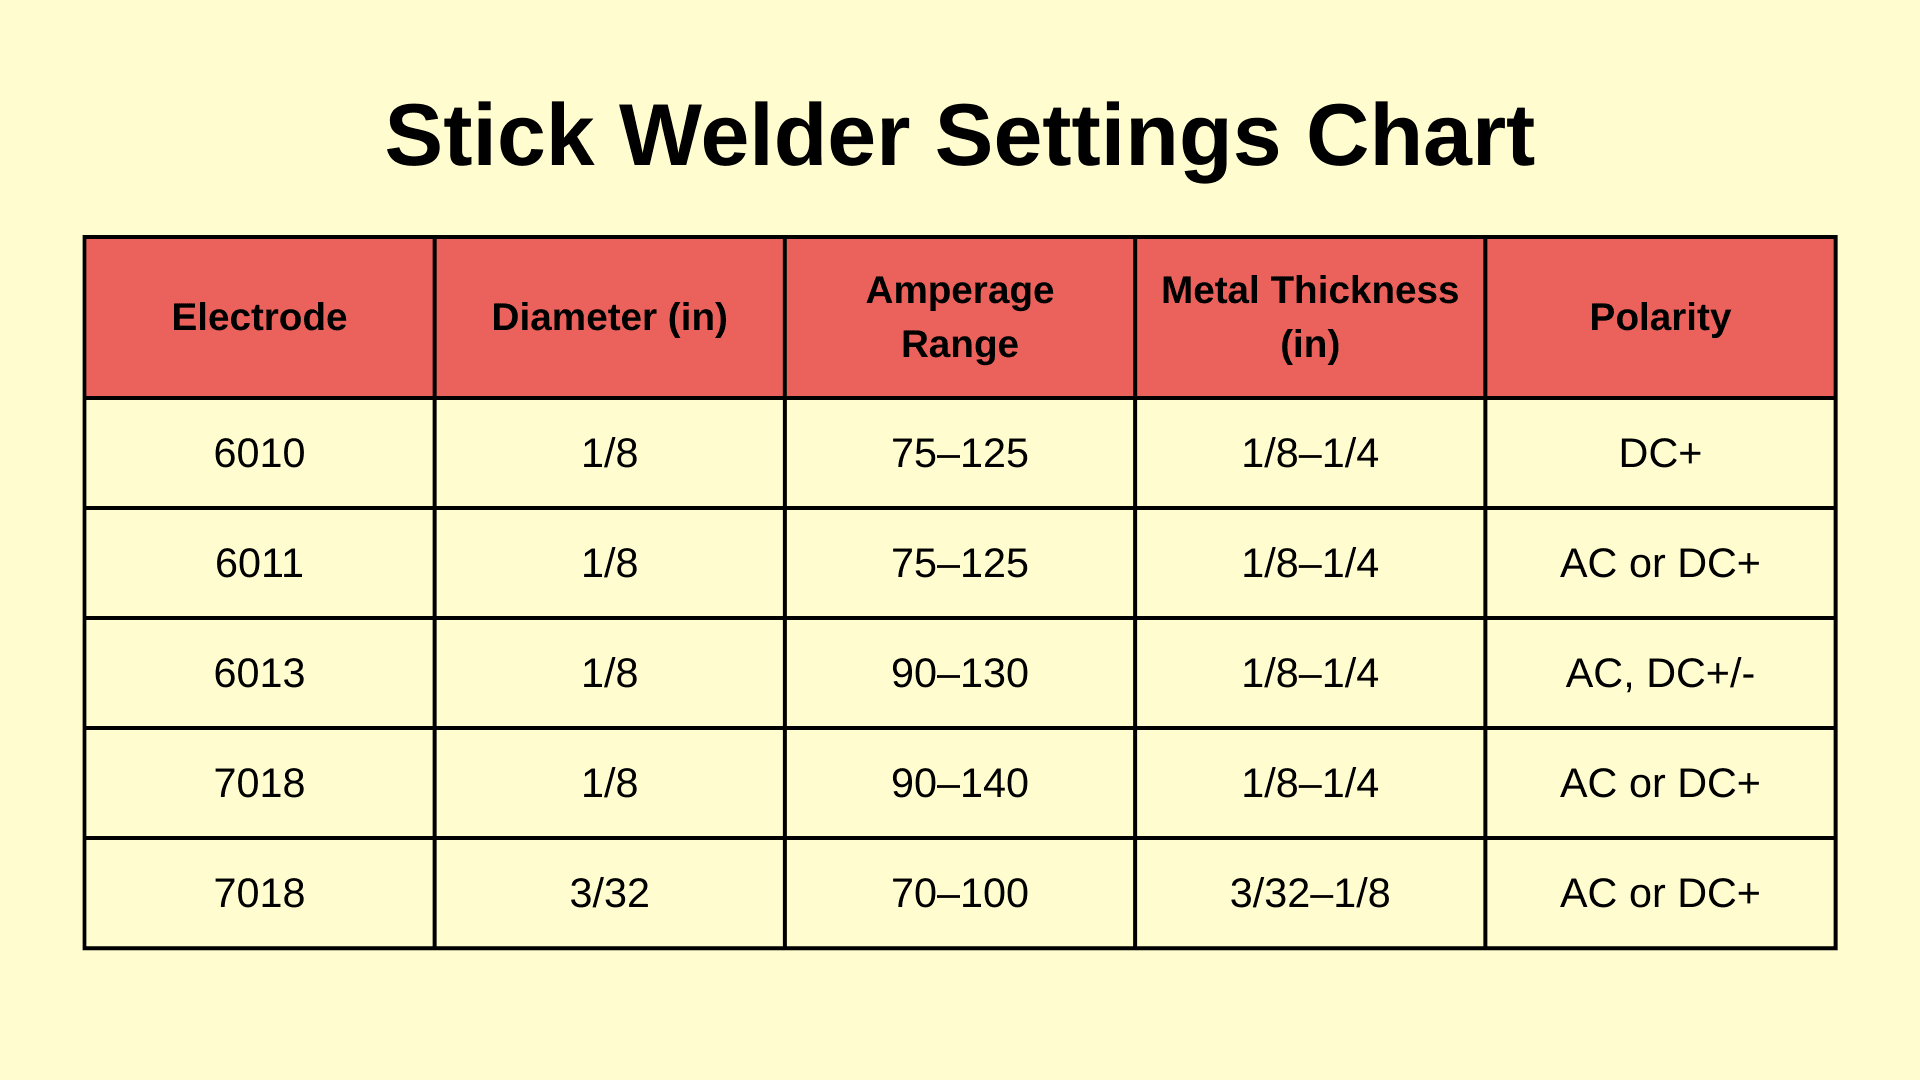
Most wire and electrode manufacturers publish detailed setting charts online. For example, Lincoln Electric provides easy-to-read charts for many processes and materials. Always check these resources if you’re unsure.
Credit: yeswelder.com
Key Takeaways For Better Welding
- Start with the chart, but trust your eyes and ears.
- Test on scrap before working on real parts.
- Adjust in small steps for best control.
- Remember that voltage is only one part of the whole process.
With practice, you’ll learn to “feel” when the voltage is right. If your welds look and sound good, you’re on the right track.
Frequently Asked Questions
What Happens If Welding Voltage Is Too Low?
If the voltage is too low, you get a short, unstable arc. The weld bead becomes narrow and tall. There’s a higher risk of undercut or poor fusion. The arc can also “stick” and make welding harder.
How Do I Know If My Voltage Is Set Correctly?
Look for a smooth, even bead with clean edges and little spatter. Listen for a steady, soft “crackle” (for MIG). Test on scrap, and adjust voltage in small steps if the bead looks wrong.
Can I Use The Same Voltage For All Metals?
No. Different metals (steel, stainless, aluminum) need different voltages for the same thickness. Always check the manufacturer’s chart and adjust for your specific wire and metal.
Does Wire Feed Speed Affect Voltage Settings?
Wire feed speed mainly controls amperage (how much metal melts). But it also affects voltage, because a faster wire needs more voltage to keep the arc stable. Set wire speed first, then fine-tune voltage.
Is It Safe To Change Voltage While Welding?
Most modern machines let you adjust voltage during welding, but always use dry gloves and be careful. Don’t touch bare metal parts or wet surfaces when adjusting settings.
Getting the voltage right is one of the key skills in welding. With practice and these tips, you’ll be able to set your machine confidently and make strong, clean welds every time.
