Is your car struggling to start, or have you noticed dim headlights? Your car battery might be the culprit.
But before rushing to the mechanic, you can quickly check your battery’s health yourself—right at home. Testing your car battery with a multimeter is simple, fast, and can save you time and money. In this guide, you’ll learn exactly how to use a multimeter to test your battery, what the readings mean, and when it’s time to replace it.
Keep reading, and empower yourself to take control of your car’s power with confidence.
As an Amazon Associate, I earn from qualifying purchases. This helps support the site at no extra cost to you.
For vehicle work, a meter with a clear DC voltage range and reliable probes helps a lot. Our automotive multimeter guide explains what features matter most for car battery and charging-system checks.
Prepare Battery For Testing
Preparing your car battery for testing is a crucial first step. It ensures accurate and reliable results. Before using a multimeter, the battery must be in good condition and free from surface issues. This preparation avoids false readings caused by dirt or recent use.
Clean Terminals
Dirty or corroded terminals can block electrical flow. Use a wire brush or battery terminal cleaner to remove grime and corrosion. Wipe the terminals with a clean cloth afterward. Clean terminals help the multimeter get a true voltage reading. Avoid touching the terminals with bare hands to keep them clean.
Let Battery Rest
After driving, the battery voltage may be higher than normal. Turn off the car and let the battery rest for at least one hour. This allows the battery to stabilize and gives a more accurate test result. For best results, let the battery rest overnight before testing.
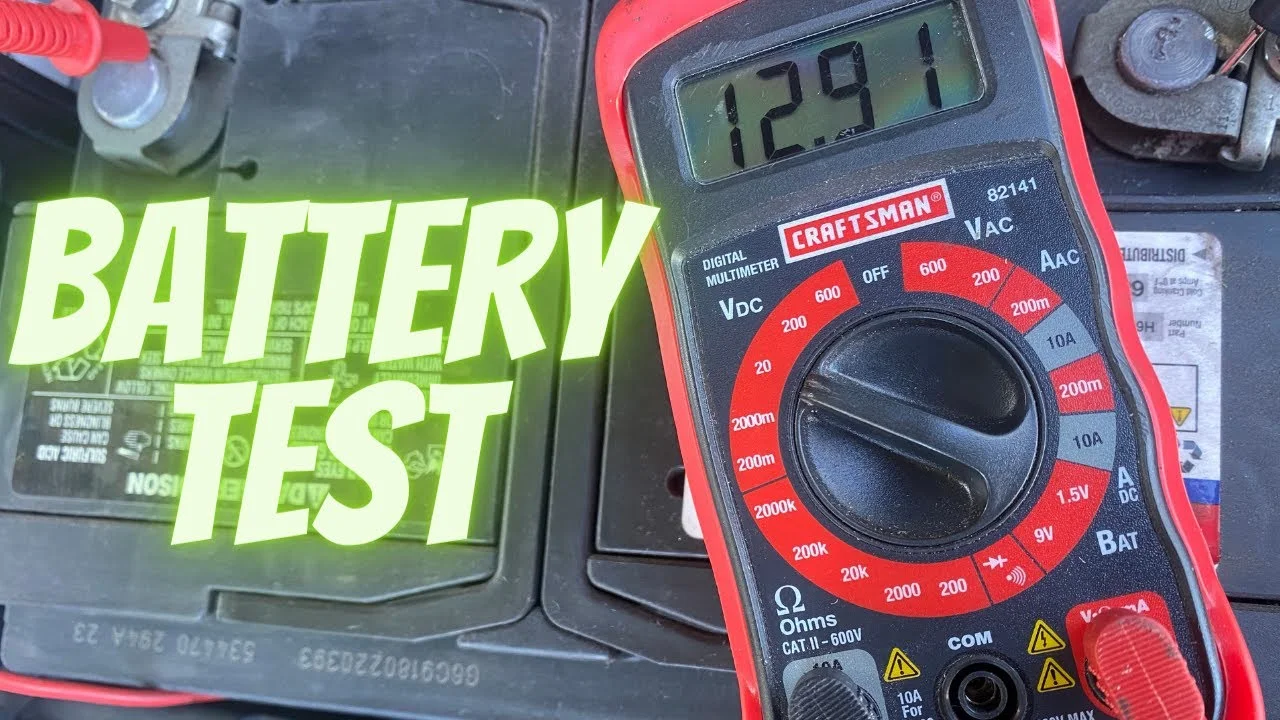
Credit: www.youtube.com
Set Up Multimeter
Setting up your multimeter correctly is essential to get an accurate reading of your car battery’s health. If you do not have a multimeter yet, we recommend the AstroAI Digital Multimeter for accurate and affordable car battery testing. A proper setup ensures safety and reliable results. Follow the steps below to prepare your multimeter before testing the battery voltage. Not sure which multimeter to get? Check our guide on choosing the right multimeter before you start.
Choose Voltage Setting
Turn the multimeter dial to the DC voltage setting. This is usually marked as “V” with a straight line above it. Select a range higher than 12 volts, such as 20V, to cover your car battery’s voltage. This prevents damaging the multimeter and ensures an accurate reading.
Connect Probes Correctly
Insert the black probe into the multimeter’s common (COM) port. Insert the red probe into the port labeled for voltage (V). When testing, touch the red probe to the battery’s positive terminal. Touch the black probe to the negative terminal. Make sure the probes have firm contact for a steady reading.
Measure Resting Voltage
Measuring the resting voltage of your car battery is the first step in testing its health. This voltage shows the battery’s true charge without any electrical load. A good resting voltage means the battery holds a proper charge. A low reading signals a weak or dead battery.
Resting voltage is measured with the car turned off. This ensures no current flows through the battery. The battery should rest for at least an hour after use to settle. This rest time gives the most accurate voltage reading.
Prepare The Battery For Testing
Start by cleaning the battery terminals. Dirt and corrosion can affect the reading. Use a wire brush or cloth to clean both terminals. Make sure the connections are tight and free of rust.
Set Up Your Multimeter
Turn on your multimeter and set it to measure DC voltage. Choose a range that covers 20 volts for car batteries. Connect the red probe to the positive terminal and the black probe to the negative terminal carefully.
Take The Voltage Reading
With the probes touching the correct terminals, read the voltage on the multimeter display. A fully charged battery shows about 12.6 volts or more. Readings below 12.4 volts indicate the battery is partially discharged. Below 12 volts means the battery is weak and may need replacement.
Interpret Resting Voltage
Interpreting the resting voltage of your car battery is a key step in testing its health. This voltage shows the battery’s charge level without any load or engine running. Checking this helps you understand if the battery can hold a charge well. Use a multimeter to measure the resting voltage accurately. The reading you get will guide you about the battery’s condition and if it needs replacing.
Voltage Range For Good Battery
A fully charged car battery shows a resting voltage between 12.6 and 12.8 volts. This range means the battery is in good health and ready to start your vehicle. If the voltage falls between 12.4 and 12.6 volts, the battery is moderately charged but still okay. Values below 12.4 volts indicate the battery is undercharged and may need charging or replacement soon. A smart battery charger like the NOCO GENIUS2 can safely restore a weak battery.
Signs Of Battery Problems
Resting voltage below 12.4 volts often signals battery issues. A voltage near 12.0 volts or less means the battery is weak or failing. Corroded or loose terminals can also cause low voltage readings. If the voltage drops quickly after charging, the battery may not hold a charge well. Inconsistent voltage readings during tests suggest internal battery damage or aging. Learn more about testing different battery types with a multimeter to identify exactly what’s failing.
Test Voltage While Starting
Testing the voltage while starting helps check the car battery’s real power. This test shows if the battery can provide enough current to start the engine. It also reveals any voltage drop during cranking, which may indicate battery issues. Use a multimeter to measure the voltage as the engine starts. This step is key to understanding battery health beyond resting voltage.
Have Engine Crank
Keep the multimeter probes on the battery terminals. Ask someone to turn the ignition key and crank the engine. Watch the multimeter screen carefully. The voltage will drop as the starter uses the battery power. This drop is normal but should not be too large. Record the lowest voltage during cranking for comparison.
Observe Voltage Drop
Check how much the voltage falls while starting. A healthy battery voltage should not drop below 9.6 volts during cranking. If it falls more, the battery might be weak or faulty. A small voltage drop means the battery can handle the engine start load. Note this reading to decide if the battery needs replacement or charging. In emergencies, a portable jump starter like the NOCO Boost GB40 can get you back on the road quickly. If the battery voltage looks fine but the car still won’t start, you may need to test the starter with a multimeter as your next step.
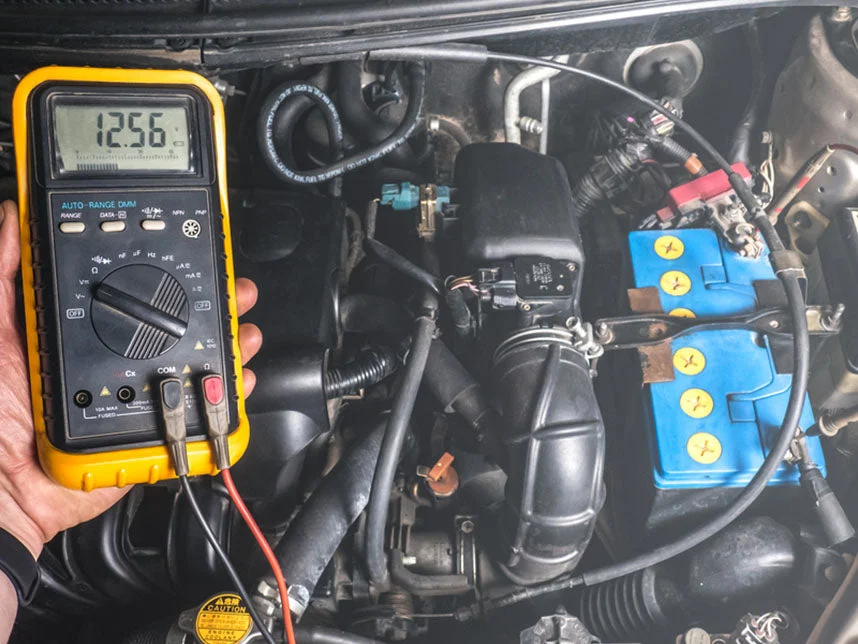
Credit: us.haynes.com
Check Voltage With Engine Running
Checking the car battery voltage with the engine running helps understand the charging system’s health. It shows how well the battery and alternator work together. This step ensures the battery gets enough charge during driving. Use a multimeter to take accurate voltage readings.
Measure Charging Voltage
Turn the multimeter on and set it to measure DC voltage. Connect the red probe to the battery’s positive terminal. Connect the black probe to the negative terminal. Start the engine and let it run at idle speed. Look at the voltage reading on the multimeter.
A healthy charging voltage typically ranges between 13.7 and 14.7 volts. This range means the alternator is charging the battery properly. If the voltage is below 13.7 volts, the battery may not charge well. If it is above 14.7 volts, the charging system could be overcharging, risking battery damage.
Evaluate Alternator Performance
The alternator supplies power to the battery while the engine runs. Check its performance by observing voltage changes when turning on electrical accessories. Turn on headlights, radio, and air conditioning. Watch the multimeter voltage as the load increases.
The voltage should stay within the healthy range despite the extra load. If it drops below 13 volts, the alternator may be weak or failing. Sudden voltage spikes or drops also indicate alternator problems. Early detection helps avoid unexpected battery or electrical failures. You should also test the ground connection with your multimeter to rule out grounding issues.
Identify Battery And System Issues
Testing a car battery with a multimeter helps find problems early. This step is key to keeping your vehicle running smoothly. It shows if the battery holds a charge or if the electrical system has faults. Simple tests can reveal whether the battery needs replacing or the car’s charging system is failing.
Understanding the battery’s condition prevents unexpected breakdowns. It saves money by avoiding costly repairs later. Use a multimeter to measure voltage and spot issues clearly. This guide explains how to identify battery and system problems easily.
Check Battery Voltage At Rest
Turn off the car and wait at least one hour. This rest time gives an accurate battery voltage reading. Connect the red probe to the positive terminal and the black probe to the negative terminal. A healthy battery shows about 12.6 volts or higher. Readings below 12.4 volts mean the battery is partly discharged. Below 12 volts suggests a weak or bad battery.
Test Voltage During Engine Start
Keep the probes on the battery terminals. Ask someone to start the engine while you watch the multimeter. Voltage should stay above 9.6 volts during cranking. If it drops below 9 volts, the battery may be weak. Low voltage here can cause starting problems and signals battery or connection issues. If all voltage readings seem fine, it’s worth also checking whether a blown fuse is causing the issue.
Measure Charging System Voltage
With the engine running, check the voltage again. The multimeter should read between 13.7 and 14.7 volts. This range shows the alternator is charging the battery properly. A reading below 13.7 volts means the alternator or charging system may fail. Above 14.7 volts can overcharge and damage the battery. This test helps spot alternator or regulator faults. For persistent electrical problems, you may also want to test your circuit breaker with a multimeter.
Safety Tips During Testing
Testing a car battery with a multimeter involves handling electrical components. Safety is very important to avoid injury and damage. Follow key safety tips to protect yourself and your vehicle during the process.
Always prepare your workspace and tools before starting. Keep the area dry and well-ventilated. Avoid sparks near the battery, as it can release flammable gases.
Wear Protective Gear
Use safety glasses to shield your eyes from acid splashes. Wear insulated electrician gloves to protect your hands from corrosion and electrical shocks. Long sleeves and closed shoes add extra protection.
Turn Off The Vehicle
Make sure the car engine is off before testing. Remove the keys from the ignition. This prevents accidental starts and electric shocks while measuring voltage.
Handle The Multimeter Correctly
Check your multimeter settings before touching the battery. Set it to the correct voltage range. Connect the probes carefully to avoid short circuits or sparks. Alternatively, a non-contact voltage tester can give a quick safety check without touching terminals directly.
Avoid Metal Contact
Keep metal tools away from battery terminals except when measuring. Metal can cause shorts or sparks if it touches both terminals or ground. Use insulated tools to be safe.
Work In A Safe Environment
Test the battery in a dry place away from open flames. Avoid smoking near the battery. Batteries can emit hydrogen gas, which is highly explosive.
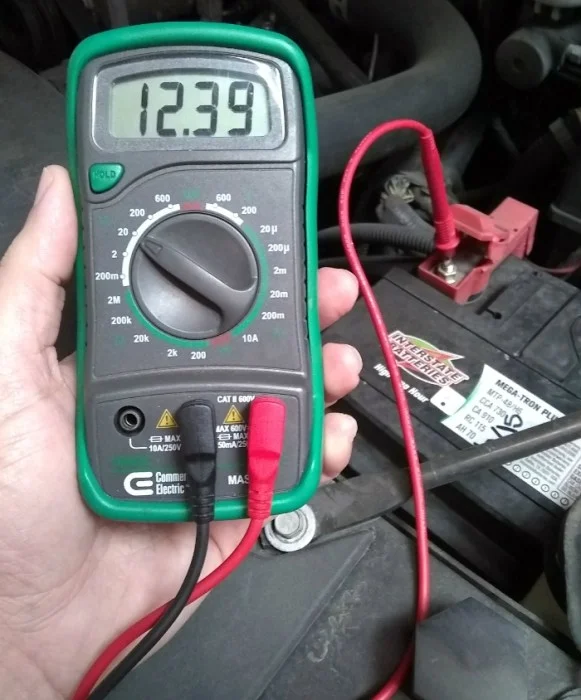
Credit: www.pomonaswapmeet.com
Authoritative External References
For further verification and technical guidance, review these authoritative external resources:
- Battery University — BU-903: How to Measure State-of-charge
- Battery University — BU-403: Charging Lead Acid
- Fluke — How to Measure DC Voltage with a Digital Multimeter
Frequently Asked Questions
How To Tell If Car Battery Is Bad With A Multimeter?
Set the multimeter to DC voltage. Connect red to positive and black to negative battery terminals. A healthy battery reads around 12. 6 volts. Below 12. 4 volts indicates a weak or bad battery. Check voltage while starting; it should not drop below 10 volts.
What Should A 12 Volt Battery Read On A Multimeter?
A 12-volt battery should read about 12. 6 volts on a multimeter when fully charged. Readings below 12. 4 volts indicate a partially discharged battery. Values under 12. 0 volts suggest the battery is weak or failing. Test voltage with the car off for an accurate resting measurement.
Can A Multimeter Detect A Completely Dead Battery?
Yes, a multimeter can detect a completely dead battery by measuring its voltage. A reading near zero volts indicates it is dead.
How To Tell If A 12 Volt Battery Has A Dead Cell?
Test the battery voltage with a multimeter; a healthy 12V battery reads about 12. 6 volts. A dead cell shows around 10. 5 volts or less. Uneven voltage or swelling indicates a bad cell.
How Do I Test A Car Battery With A Multimeter?
Set the multimeter to DC volts. Connect red to positive and black to negative terminals. Read the voltage.
What Voltage Shows A Healthy Car Battery?
A healthy battery shows about 12. 6 volts when the car is off.
Conclusion
Testing your car battery with a multimeter is simple and effective. It helps you find battery problems early. Clean terminals and proper settings give accurate results. Check voltage with the car off, starting, and running. This step-by-step process saves time and money.
Regular testing keeps your car reliable. A working battery means fewer surprises on the road. Try testing your battery today to stay prepared.
Related Reading
- How to Use a Multimeter: Complete Beginner’s Guide
- How to Choose a Multimeter: Expert Tips for the Right Pick
- How to Test a Fuse With a Multimeter: Quick & Easy Guide
- How to Test a Starter With a Multimeter
- How to Test a Motor With a Multimeter: Step-by-Step Guide
- How to Test a Battery With a Multimeter
